目录
一、博客系统主要页面图片展示
二、博客项目创建
三、博客主页面(blog_list.html)
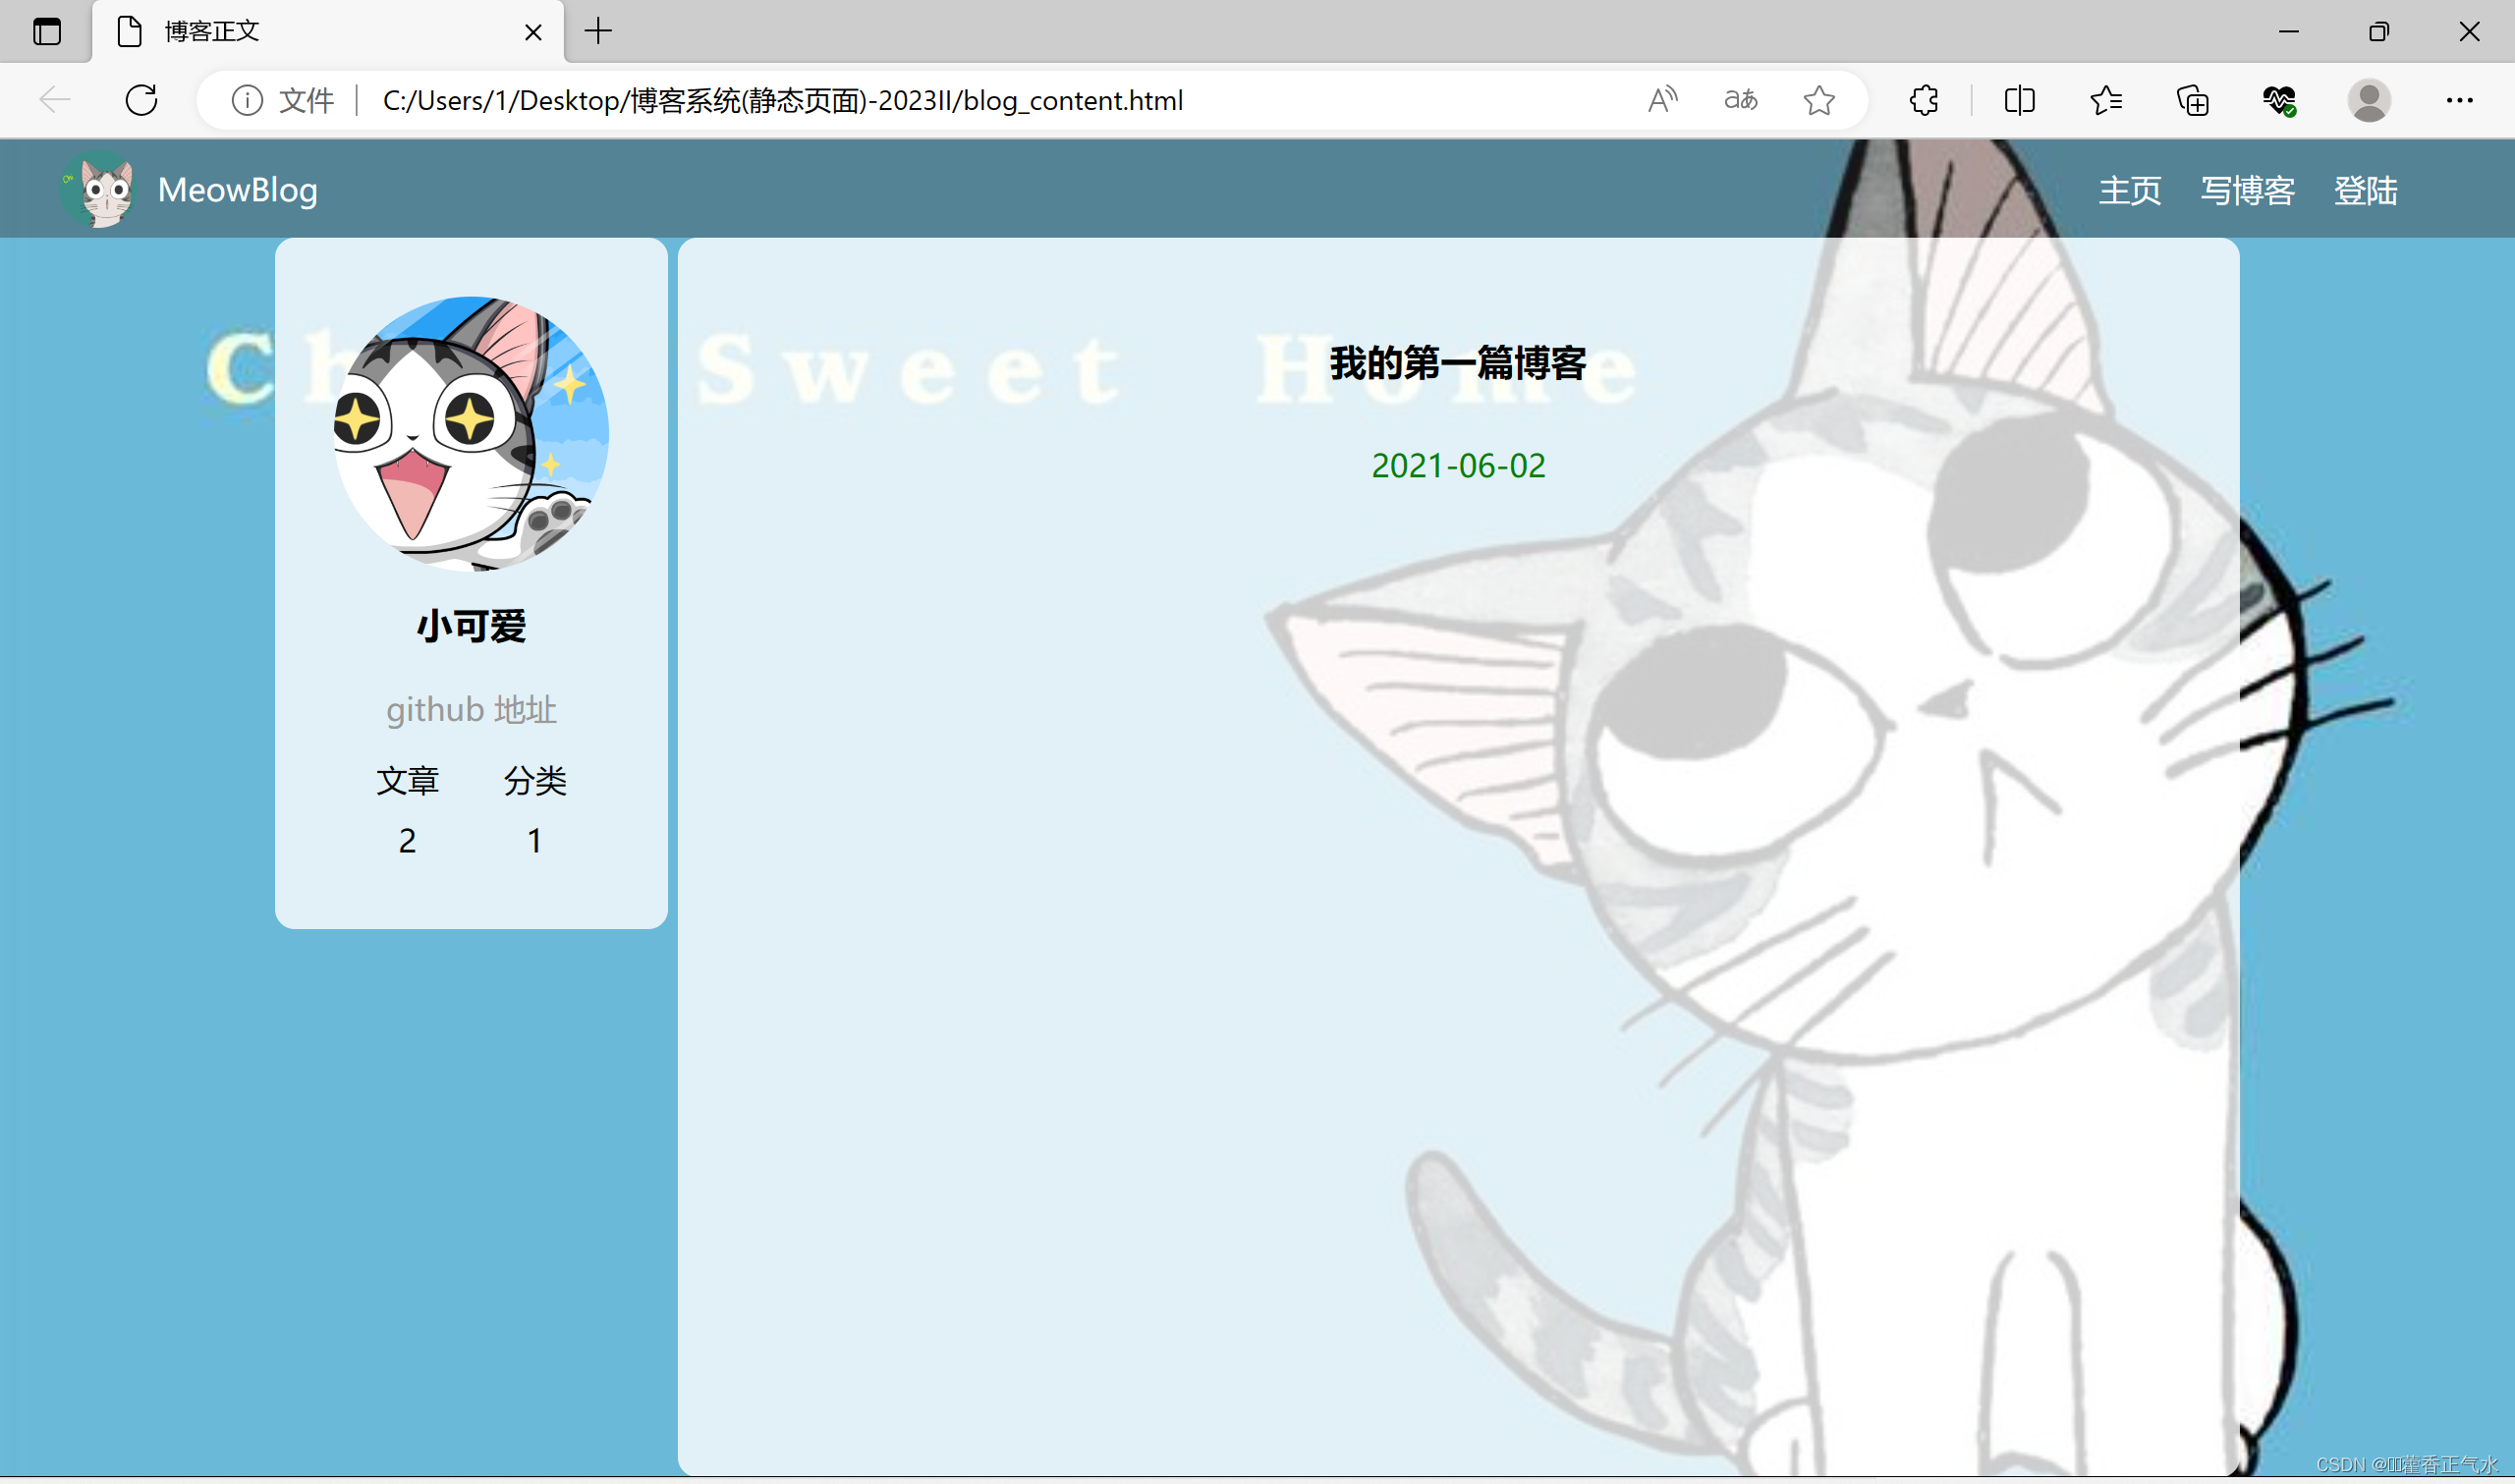
三、博客详情页(blog_content.html)
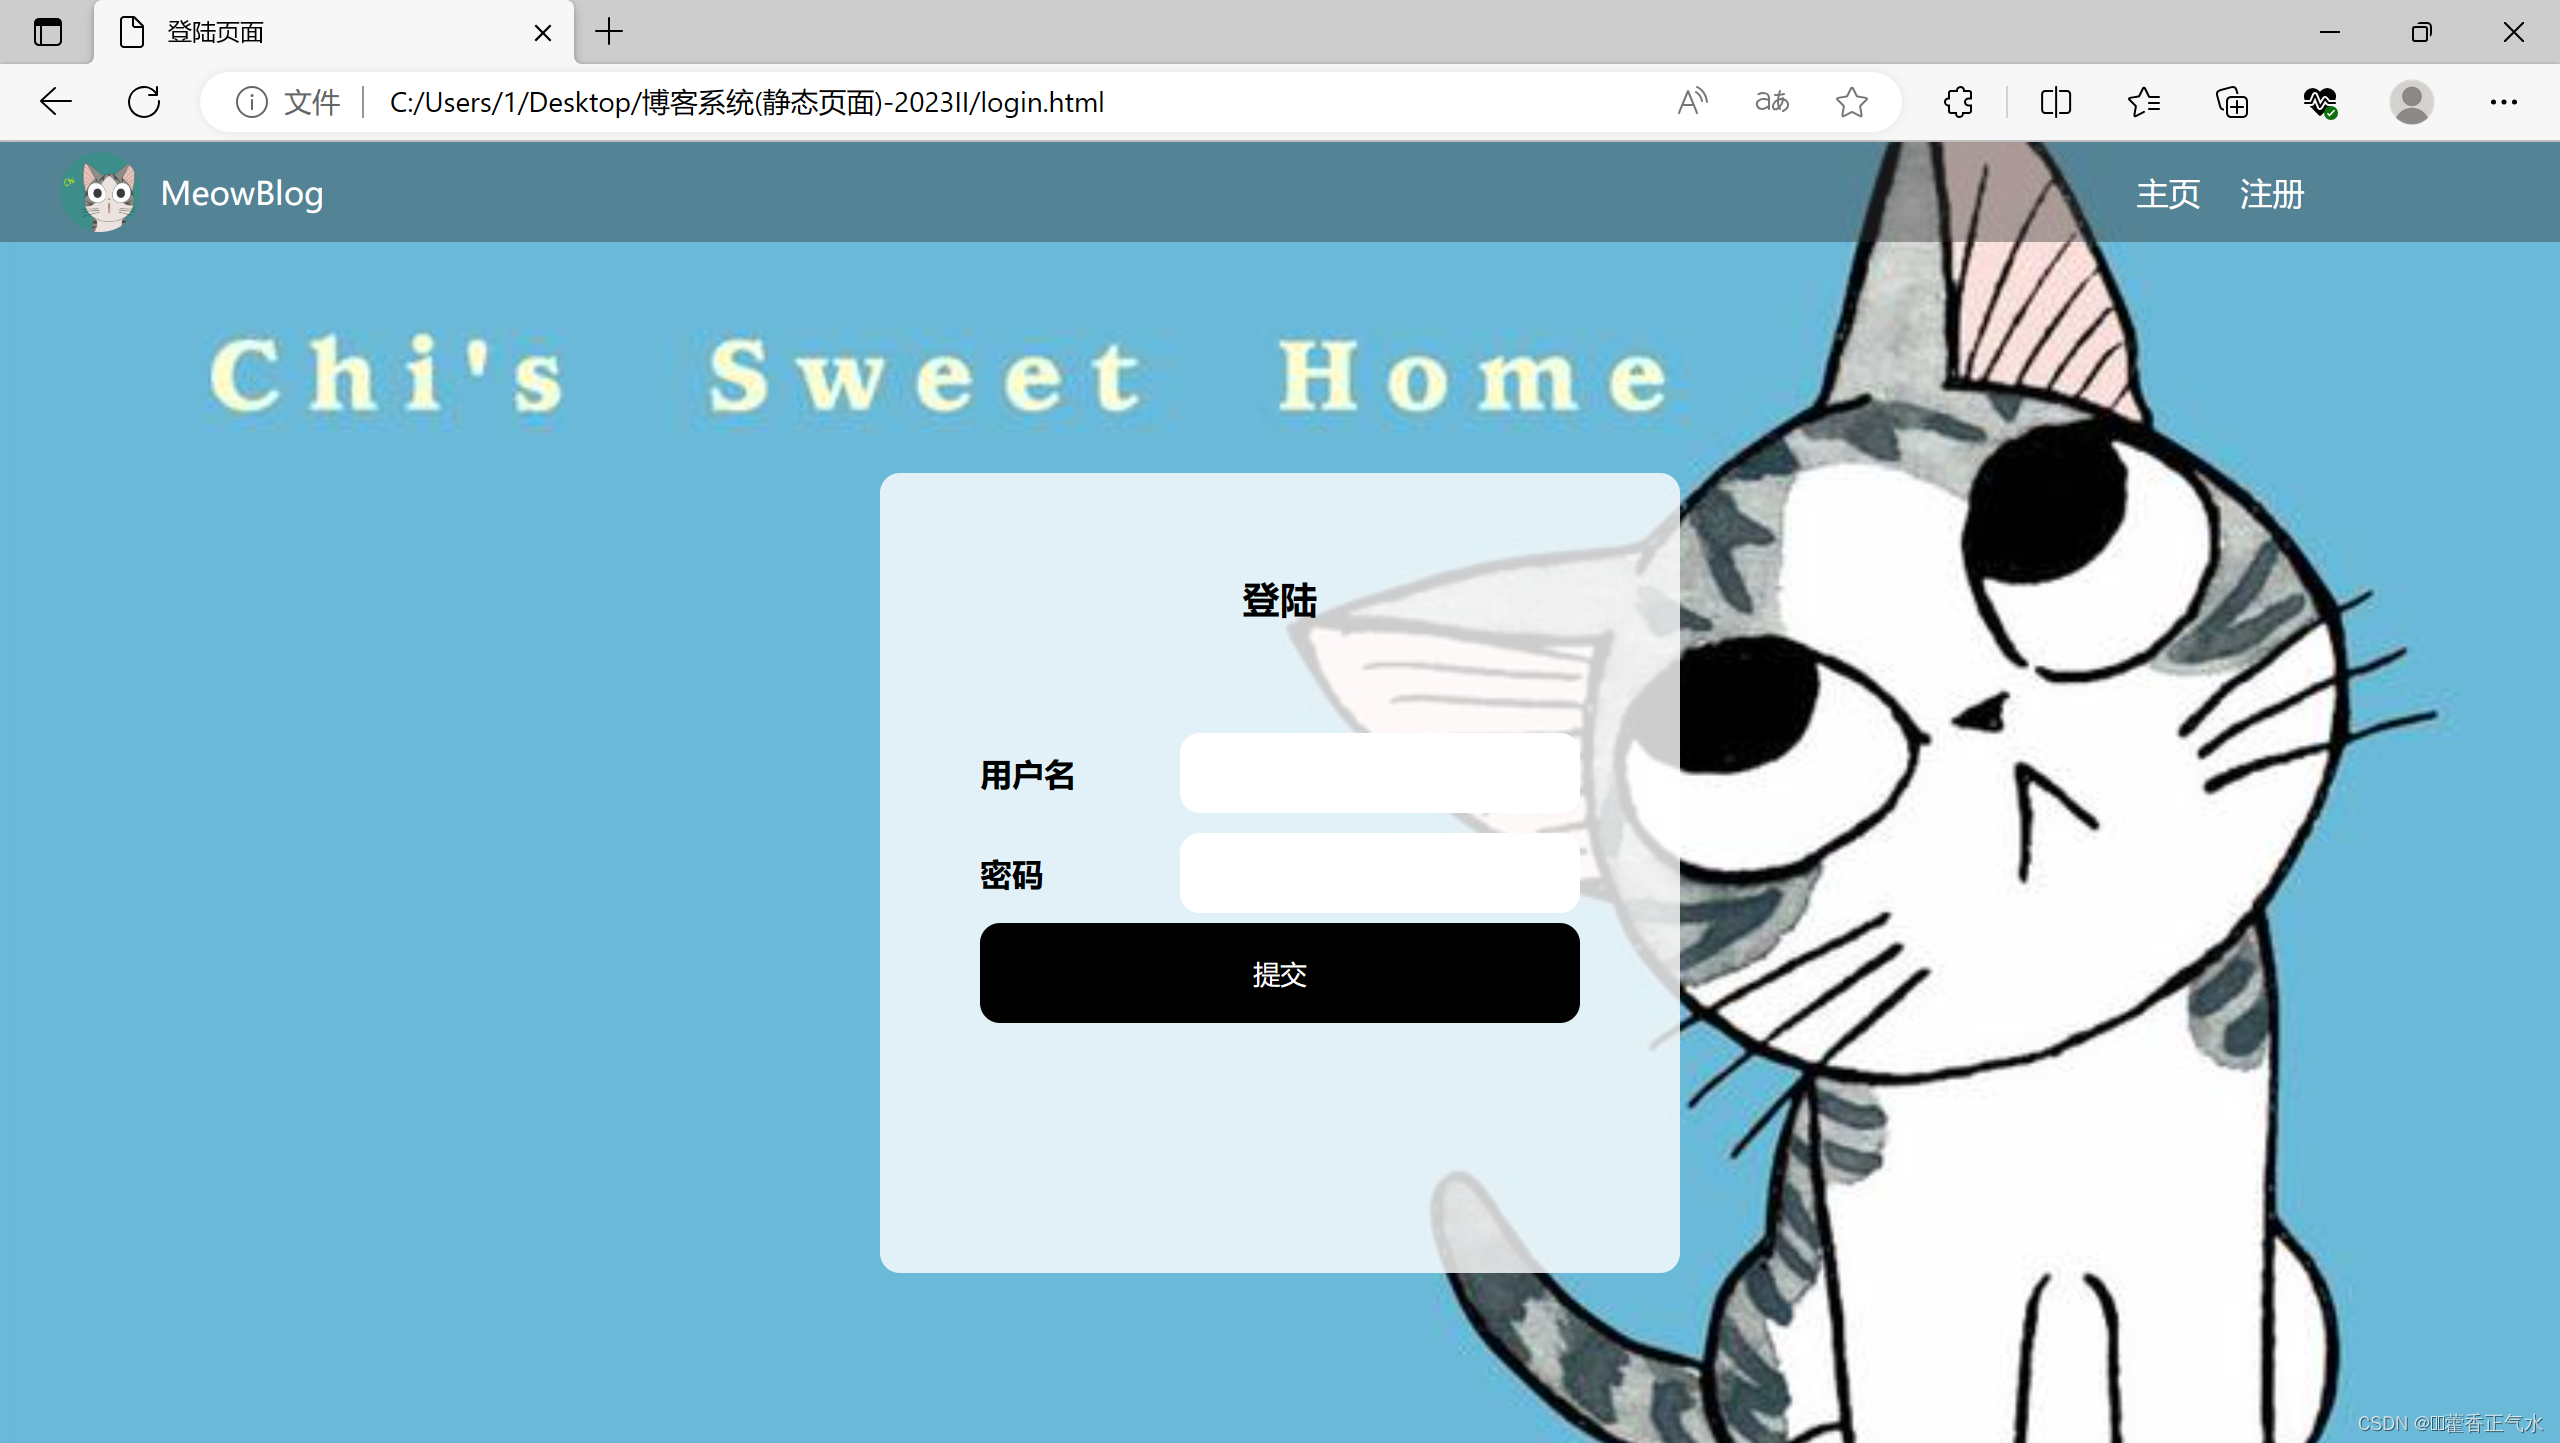
四、博客登录页(login.html)
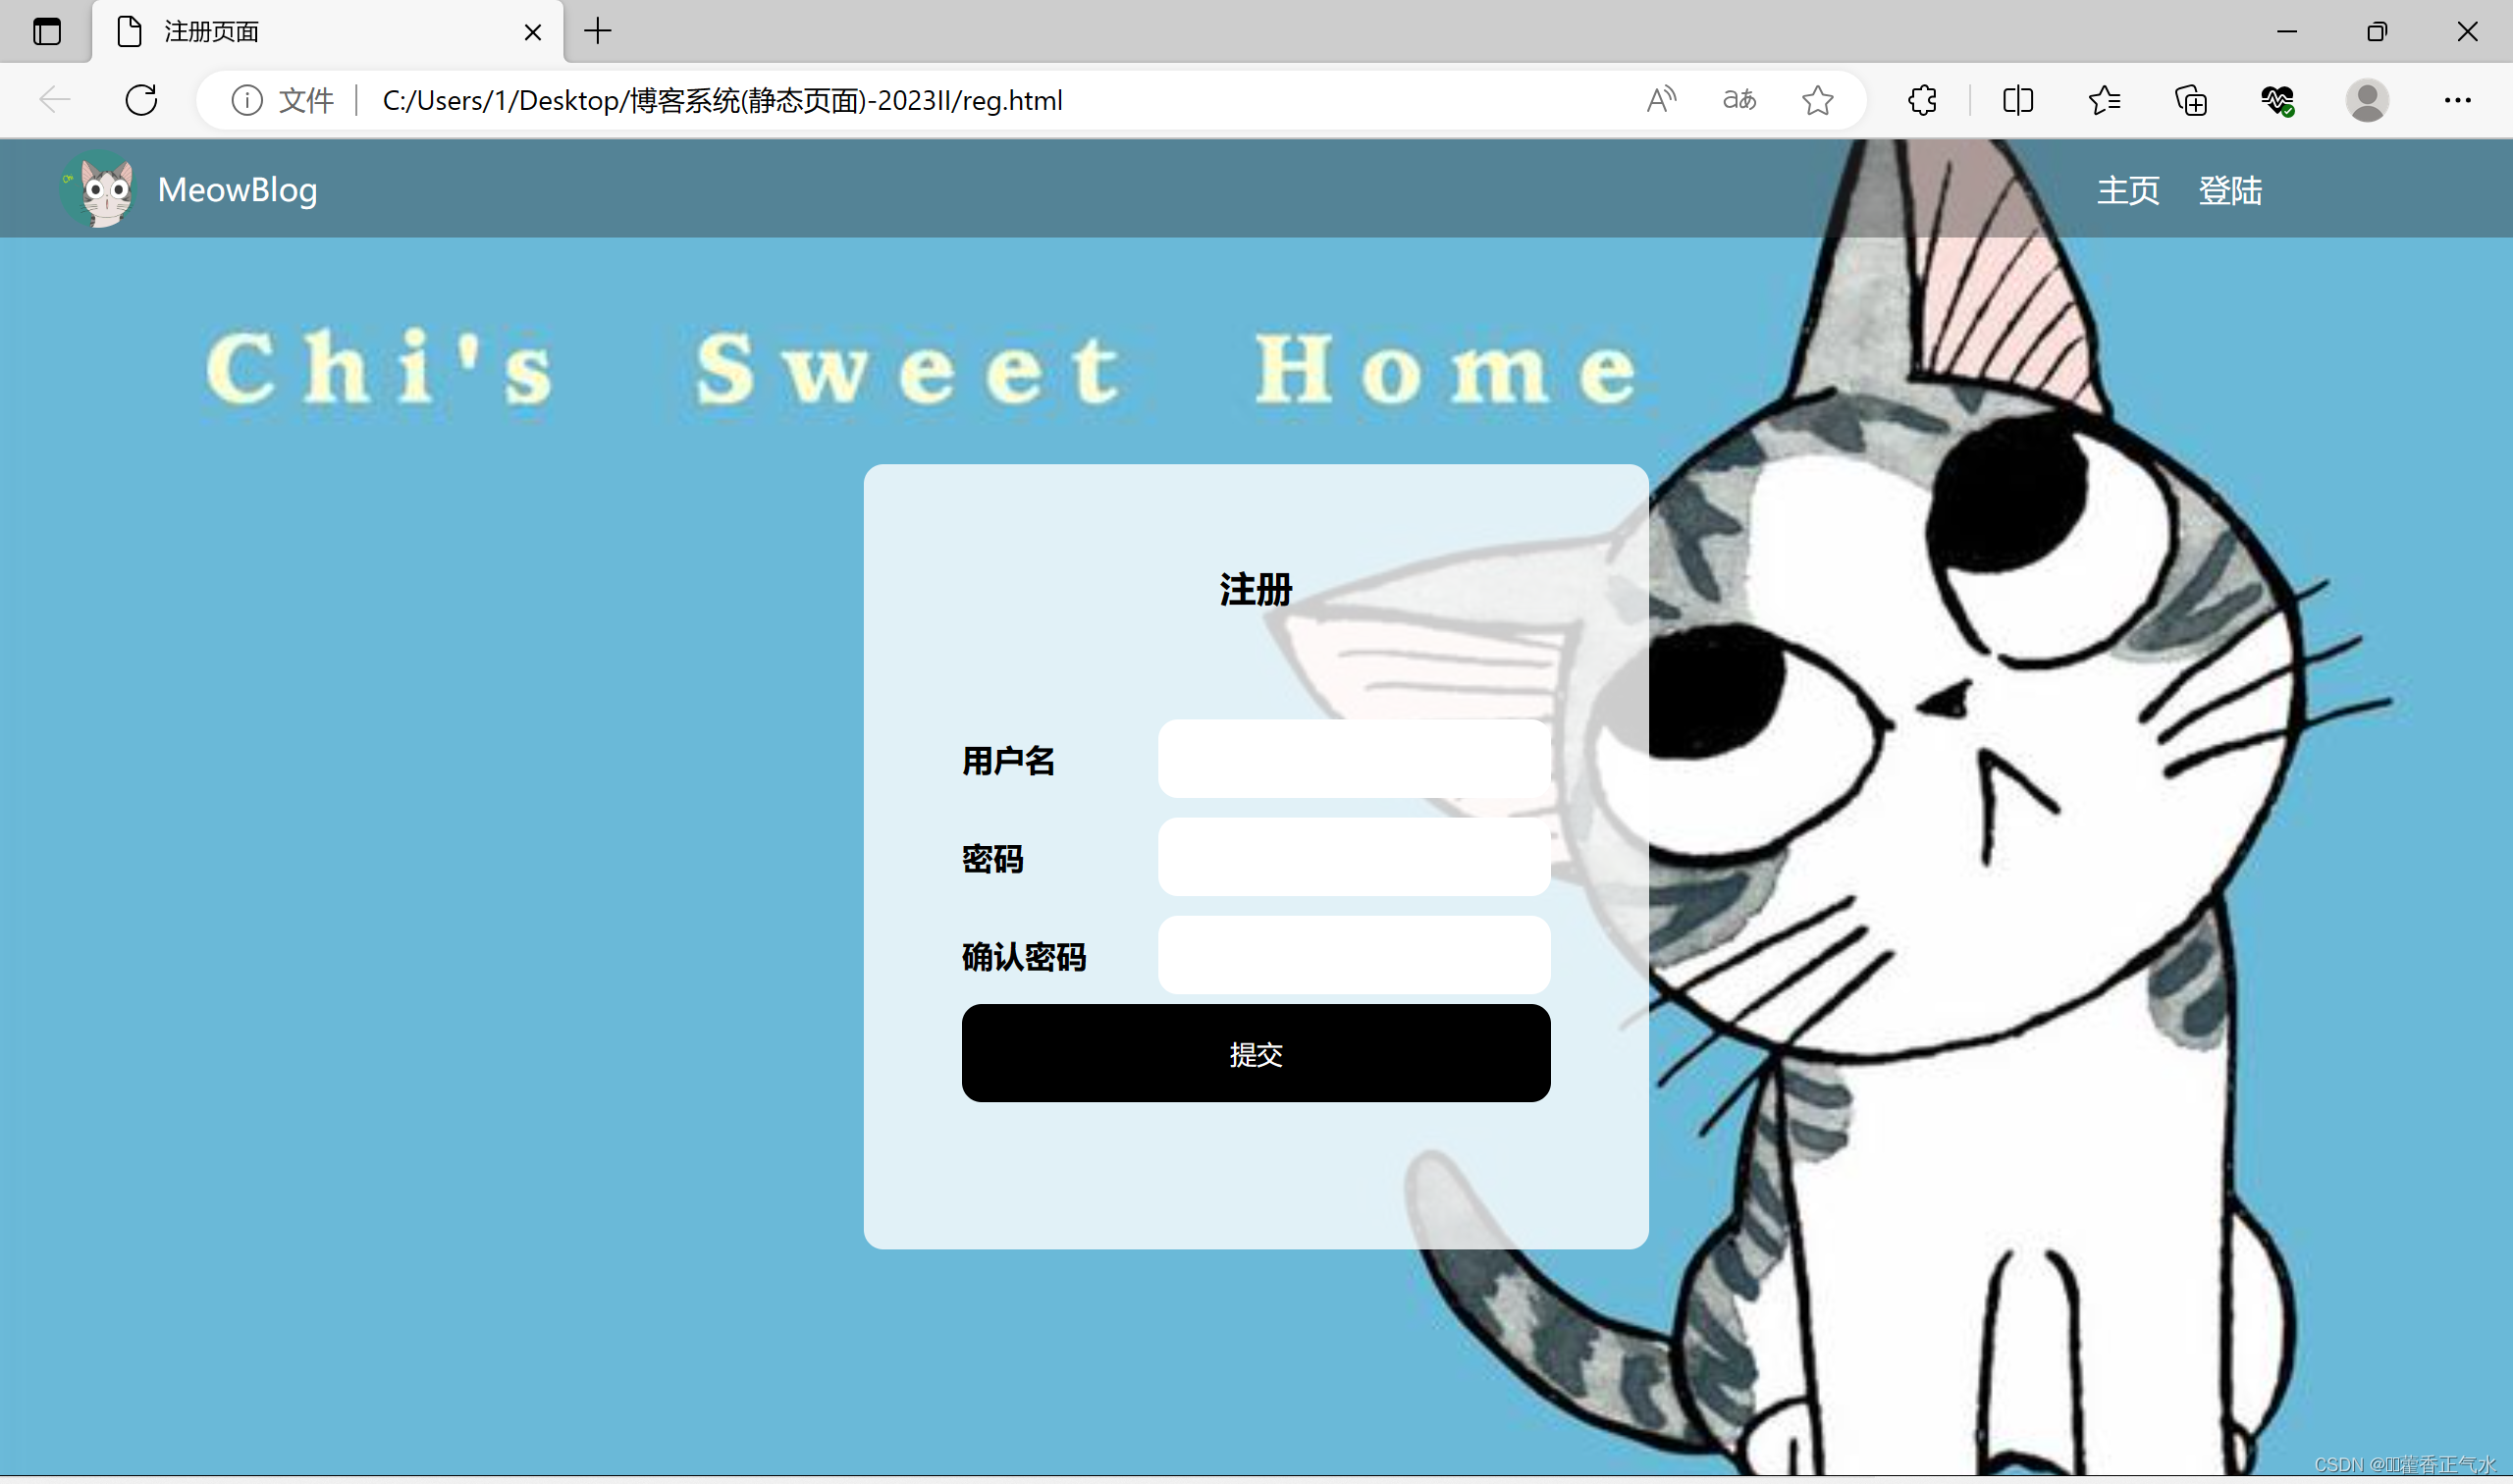
五、博客注册页(reg.html)
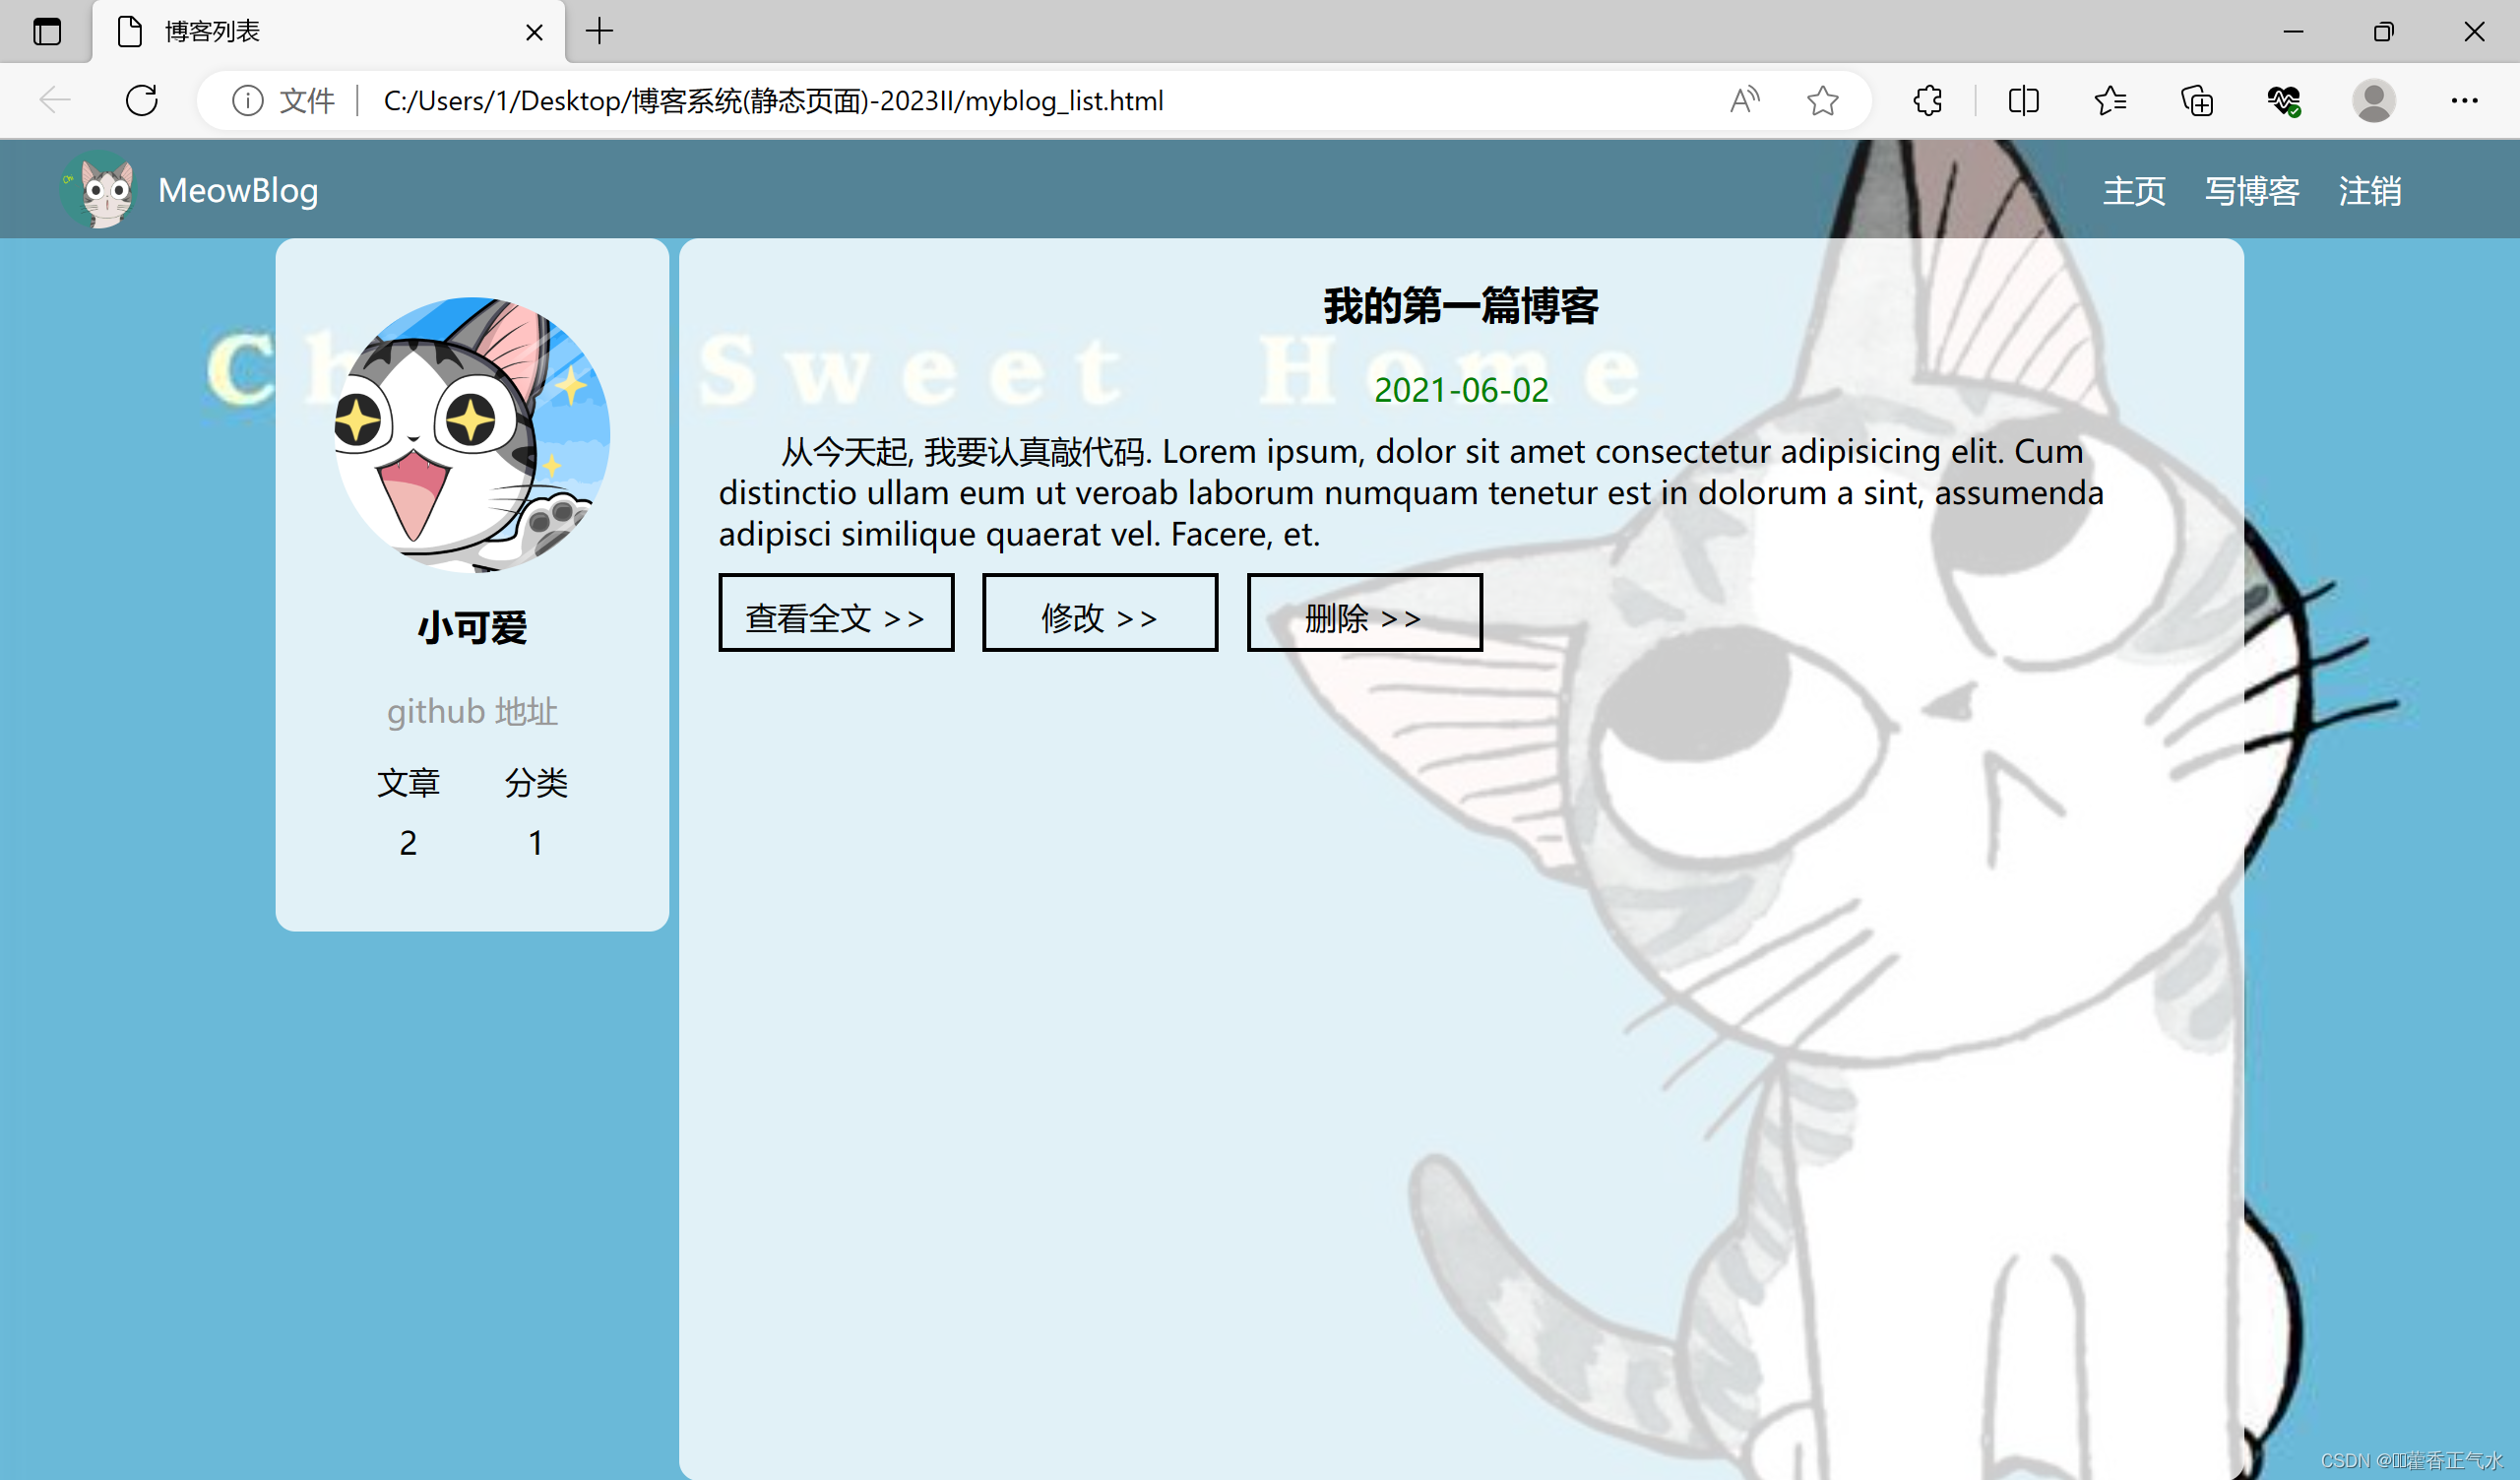
六、博客个人中心(myblog_list.html)
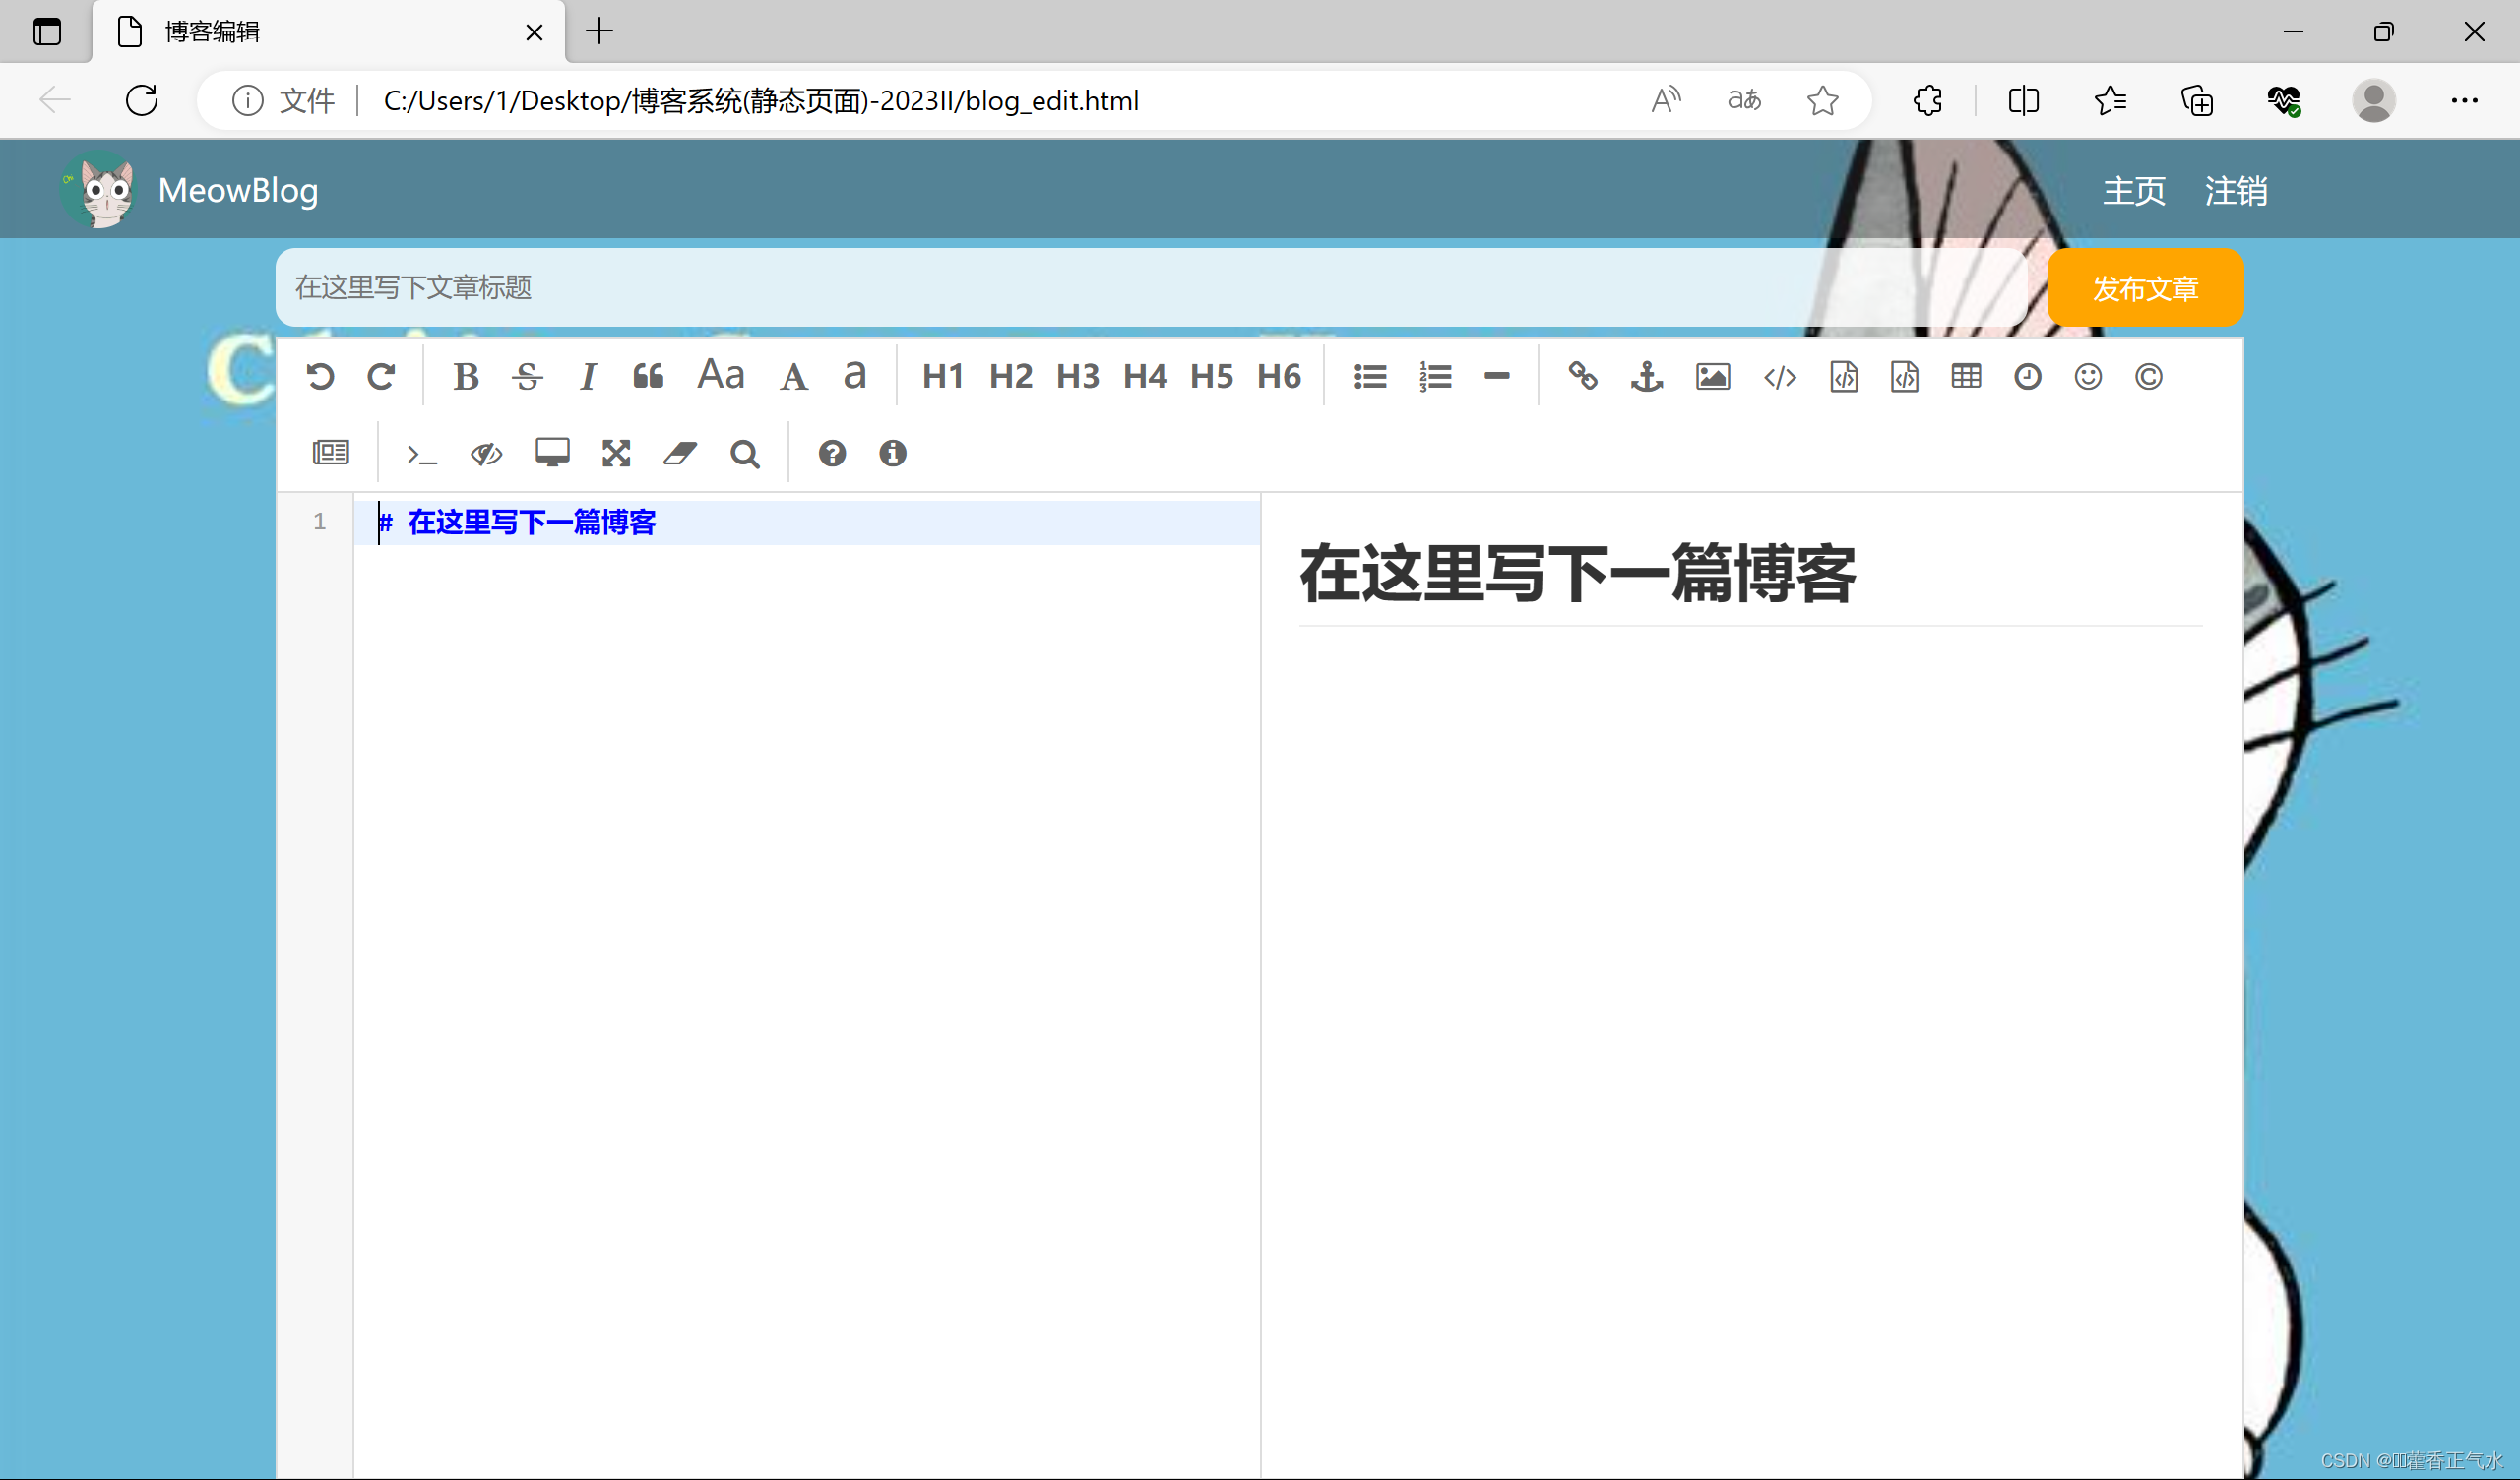
七、博客编辑页面(bolog_edit.html)
1.editor.md文件下载
2.博客编辑页”blog_editor”
一、博客系统主要页面图片展示
二、博客项目创建
使用vscode编辑器,创建一个项目为blog_system,自己找好路径,我是放在d盘
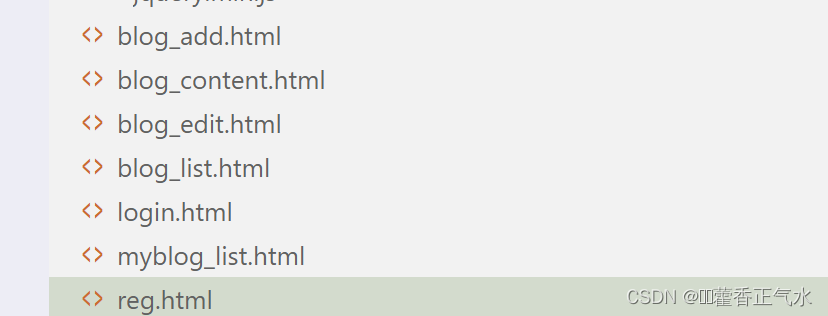
项目主要包括四个页面:
- 博客主页面 blog_list.html
- 博客详情页 blog_content.html
- 博客登录页 login.html
- 博客编辑页 blog_edit.html
- 博客注册页 blog_reg.html
- 博客个人页面 myblog_list.html
- 博客添加页(和blog_edit.html代码一样)
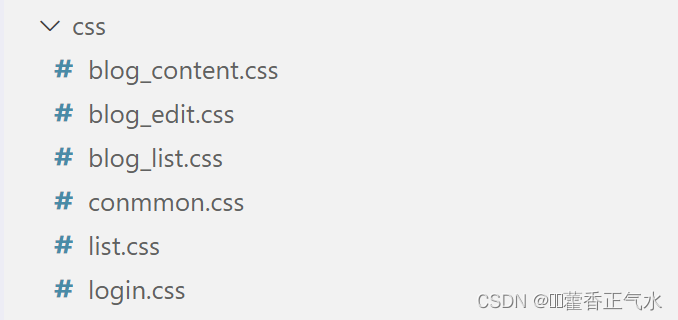
然后对应的css文件如下 ,新建一个文件夹,放置css文件,其中commen.css是全部页面都会用到的样式,所以写在一起。
然后需要找三张图片,在项目中创建一个image文件夹,里面放需要的图片
- 背景图
- 博客logo
- 头像图片
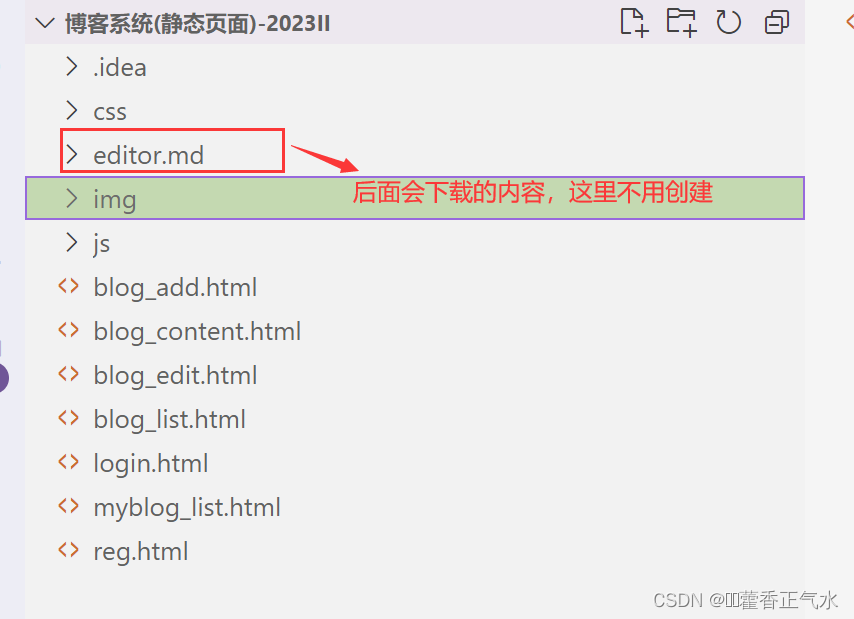
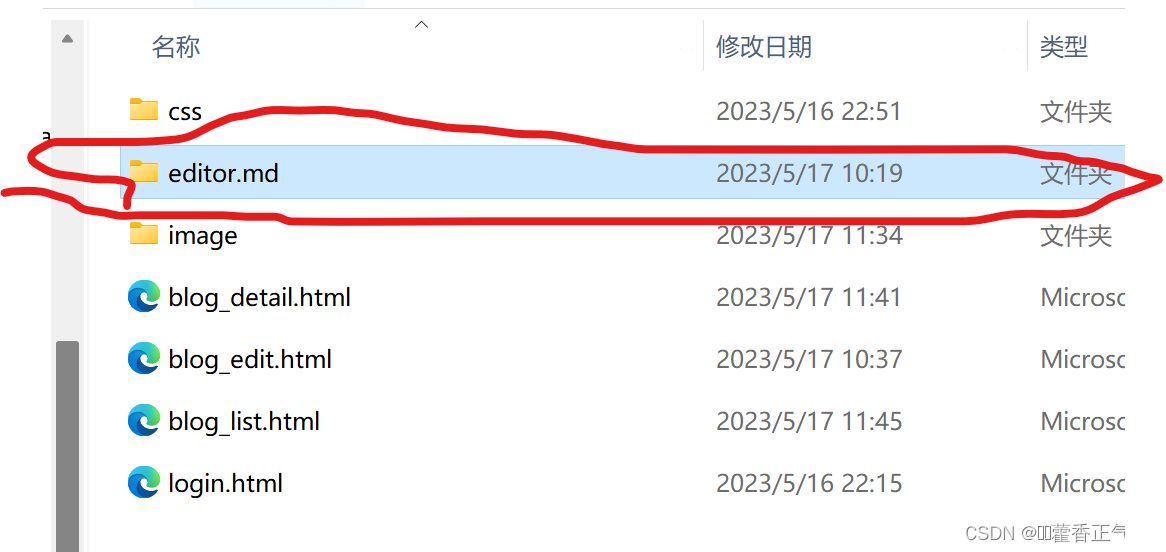
主要的项目构成如下,editor.md后面会讲怎么创建,这里先不用管,只需要把css文件,image文件和html页面创建好就可以,注意html页面与这几个文件同级。
js中只需要放置一个jquern依赖就可以了,这个可以在网上进行下载
三、博客主页面(blog_list.html)
大家要注意自己的路径还有图片命名,因为我是本地路径,所以大家需要自己写路径,这样才会有效果。
blog_list.html:
<!DOCTYPE html>
<html lang="en">
<head>
<meta charset="UTF-8">
<meta http-equiv="X-UA-Compatible" content="IE=edge">
<meta name="viewport" content="width=device-width, initial-scale=1.0">
<title>博客列表</title>
<link rel="stylesheet" href="css/list.css">
<link rel="stylesheet" href="css/blog_list.css">
<style>
.nav{
position: fixed;
top: 0;
left: 0;
right: 0;
height: 50px;
}
.container{
padding-top: 80px;
height: auto;
}
.container-right{
width: auto;
}
.blog-pagnation-wrapper{
height: 40px;
margin: 16px 0;
text-align: center;
}
.blog-pagnation-item{
display: inline-block;
padding: 8px;
border: 1px solid #d0d0d5;
color: #333;
}
.blog-pagnation-item:hover{
background: #4e4eeb;
color: #fff;
}
.blog-pagnation-item.actvie{
background: #4e4eeb;
color: #fff;
}
</style>
<script src="js/jquery.min.js"></script>
<script src="js/urlutils.js"></script>
</head>
<body>
<!-- 导航栏 -->
<div class="nav">
<img src="img/logo2.jpg" alt="">
<span class="title">我的博客系统</span>
<!-- 用来占据中间位置 -->
<span class="spacer"></span>
<a href="blog_list.html">主页</a>
<a href="blog_add.html">写博客</a>
<a href="login.html">登陆</a>
<!-- <a href="#">注销</a> -->
</div>
<!-- 版心 -->
<div class="container">
<!-- 右侧内容详情 -->
<div class="container-right" style="width: 100%;">
<!-- 每一篇博客包含标题, 摘要, 时间 -->
<div class="blog" >
<div class="title">我的第一篇博客</div>
<div class="date">2021-06-02</div>
<div class="desc">正文</div>
<a href="blog_content.html?id=1" class="detail">查看全文 >></a>
</div>
<div class="blog">
<div class="title">我的第一篇博客</div>
<div class="date">2021-06-02</div>
<div class="desc">正文</div>
<a href="blog_content.html?id=1" class="detail">查看全文 >></a>
</div>
<hr>
<div class="blog-pagnation-wrapper">
<button class="blog-pagnation-item">首页</button>
<button class="blog-pagnation-item">上一页</button>
<button class="blog-pagnation-item">下一页</button>
<button class="blog-pagnation-item">末页</button>
当前在第 <span id="pindex"></span> 页,共 <span id="pszie"></span> 页
</div>
</div>
</div>
</body>
</html>“css/commen.css”:
* {
    margin: 0;
    padding: 0;
    box-sizing: border-box;
}

/* 设置整体页面高度 */
html, body {
    height: 100%;
    background-image: url(../img/cat.jpg);
    /* background-image: linear-gradient(to top, #3779ec 0%, #72afd3 100%); */
    background-position: center center;
    background-size: cover;
    background-repeat: no-repeat;
}

/* 上方导航栏 */
.nav {
    width: 100%;
    height: 50px;
    background-color: rgba(51, 51, 51, 0.4);
    color: #fff;

    display: flex;
    justify-content: left;
    align-items: center;
}

/* 导航栏中的图标 */
.nav img {
    width: 40px;
    height: 40px;
    margin-left: 30px;
    margin-right: 10px;
    border-radius: 50%;
}

/* 导航栏中的占位器 */
.nav .spacer {
    width: 70%;
}

/* 导航栏中的按钮 */
.nav a {
    color: #fff;
    text-decoration: none;
    padding: 0 10px;
}

/* 页面内容容器, 版心 */
.container {
    /* 使用 calc 计算高度 */
    height: calc(100% - 50px);
    /* 设置版心宽度 */
    width: 1000px;
    /* 水平居中 */
    margin: 0 auto;
    /* 使用弹性布局 */
    display: flex;
    justify-content: space-between;
    align-items: center;
}

/* 左侧部分, 用来放置用户信息 */
.container-left {
    height: 100%;
    width: 200px;
}

/* 右侧部分, 用来放置正文 */
.container-right {
    height: 100%;
    /* 和左侧部分中间留出 5px 间隙 */
    width: 795px;
    /* 如果内容溢出就自动加上滚动条 */
    overflow: auto;
    background-color: rgba(255, 255, 255, 0.8);
    border-radius: 10px;
}

/* 展示用户信息的卡片 */
.card {
    background-color: rgba(255, 255, 255, 0.8);
    border-radius: 10px;
    padding: 30px;
}

/* 用户头像 */
.card img {
    width: 140px;
    height: 140px;
    border-radius: 50%;
}

/* 用户名 */
.card h3 {
    text-align: center;
    padding: 10px;
}

/* 用户 github 链接 */
.card a {
    display: block;
    text-align: center;
    color: #999;
    text-decoration: none;
    padding: 10px;
}

/* 展示文章数目的面板 */
.card .counter {
    padding: 5px;
    display: flex;
    justify-content: space-around;
}
“blog_list.css”:
/* 表示一篇博客 */ .blog { width: 100%; padding: 10px 20px; } /* 博客的标题 */ .blog .title { color: black; font-size: 20px; font-weight: 700; text-align: center; padding: 10px 0; } /* 博客的摘要 */ .blog .desc { color: #000; text-indent: 2em; margin-top: 10px; } /* 博客的日期 */ .blog .date { color: #008000; margin-top: 10px; text-align: center; } /* 查看详情 按钮 */ .blog .detail { display: inline-block; width: 120px; height: 40px; line-height: 40px; color: black; text-align: center; text-decoration: none; margin: 10px auto 0 auto; border: 2px solid black; /* 给颜色加上过渡效果 */ transition: all 0.3s; } /* 查看详情按钮的鼠标 hover 效果 */ .blog .detail:hover { background-color: #000; color: #fff; }“list.css”
* {
    margin: 0;
    padding: 0;
    box-sizing: border-box;
}

/* 设置整体页面高度 */
html, body {
    height: 100%;
    background-image: url(../img/cat.jpg);
    /* background-image: linear-gradient(to top, #37ecba 0%, #72afd3 100%); */
    background-position: center center;
    background-size: cover;
    background-repeat: repeat-y;
}

/* 上方导航栏 */
.nav {
    width: 100%;
    height: 50px;
    background-color: rgba(51, 51, 51, 0.4);
    color: #fff;

    display: flex;
    justify-content: left;
    align-items: center;
}

/* 导航栏中的图标 */
.nav img {
    width: 40px;
    height: 40px;
    margin-left: 30px;
    margin-right: 10px;
    border-radius: 50%;
}

/* 导航栏中的占位器 */
.nav .spacer {
    width: 70%;
}

/* 导航栏中的按钮 */
.nav a {
    color: #fff;
    text-decoration: none;
    padding: 0 10px;
}

/* 页面内容容器, 版心 */
.container {
    /* 使用 calc 计算高度 */
    height: calc(100% - 50px);
    /* 设置版心宽度 */
    width: 1000px;
    /* 水平居中 */
    margin: 0 auto;
    /* 使用弹性布局 */
    display: flex;
    justify-content: space-between;
    align-items: center;
}

/* 左侧部分, 用来放置用户信息 */
.container-left {
    height: 100%;
    width: 200px;
}

/* 右侧部分, 用来放置正文 */
.container-right {
    height: 100%;
    /* 和左侧部分中间留出 5px 间隙 */
    width: 795px;
    /* 如果内容溢出就自动加上滚动条 */
    overflow: auto;
    background-color: rgba(255, 255, 255, 0.8);
    border-radius: 10px;
}

/* 展示用户信息的卡片 */
.card {
    background-color: rgba(255, 255, 255, 0.8);
    border-radius: 10px;
    padding: 30px;
}

/* 用户头像 */
.card img {
    width: 140px;
    height: 140px;
    border-radius: 50%;
}

/* 用户名 */
.card h3 {
    text-align: center;
    padding: 10px;
}

/* 用户 github 链接 */
.card a {
    display: block;
    text-align: center;
    color: #999;
    text-decoration: none;
    padding: 10px;
}

/* 展示文章数目的面板 */
.card .counter {
    padding: 5px;
    display: flex;
    justify-content: space-around;
}
三、博客详情页(blog_content.html)
blog_content.html:
<!DOCTYPE html>
<html lang="en">

<head>
    <meta charset="UTF-8">
    <meta http-equiv="X-UA-Compatible" content="IE=edge">
    <meta name="viewport" content="width=device-width, initial-scale=1.0">
    <title>博客正文</title>
    <link rel="stylesheet" href="css/conmmon.css">
    <link rel="stylesheet" href="css/blog_content.css">
    <link rel="stylesheet" href="editor.md/css/editormd.preview.min.css" />
    <script src="js/jquery.min.js"></script>
    <script src="editor.md/editormd.js"></script>
    <script src="editor.md/lib/marked.min.js"></script>
    <script src="editor.md/lib/prettify.min.js"></script>
</head>

<body>
    <!-- 导航栏 -->
    <div class="nav">
        <img src="img/logo2.jpg" alt="">
        <span class="title">MeowBlog</span>
        <!-- 用来占据中间位置 -->
        <span class="spacer"></span>
        <a href="blog_list.html">主页</a>
        <a href="blog_edit.html">写博客</a>
        <a href="login.html">登陆</a>
    </div>
    <!-- 版心 -->
    <div class="container">
        <!-- 左侧个人信息 -->
        <div class="container-left">
            <div class="card">
                <img src="img/avatar.png" class="avtar" alt="">
                <h3>小可爱</h3>
                <a href="http:www.github.com">github 地址</a>
                <div class="counter">
                    <span>文章</span>
                    <span>分类</span>
                </div>
                <div class="counter">
                    <span>2</span>
                    <span>1</span>
                </div>
            </div>
        </div>
        <!-- 右侧内容详情 -->
        <div class="container-right">
            <div class="blog-content">
                <!-- 博客标题 -->
                <h3>我的第一篇博客</h3>
                <!-- 博客时间 -->
                <div class="date">2021-06-02</div>
                <!-- 博客正文 -->
                <div id="editorDiv">

                </div>
            </div>
        </div>
    </div>
    <script type="text/javascript">
            var editormd;
            function initEdit(md){
                editormd = editormd.markdownToHTML("editorDiv", {
                markdown : md, // Also, you can dynamic set Markdown text
                // htmlDecode : true,  // Enable / disable HTML tag encode.
                // htmlDecode : "style,script,iframe",  // Note: If enabled, you should filter some dangerous HTML tags for website security.
                });
            }

    </script>
</body>

</html>
“blog_detail.css”编写:
/* 博客正文容器 */ .blog-content { padding: 30px; } /* 博客标题 */ .blog-content h3 { text-align: center; padding: 20px 0; } /* 博客日期 */ .blog-content .date { color: #008000; padding: 10px 0; text-align: center; } /* 博客内容段落 */ .blog-content p { text-indent: 2em; padding: 10px 0; }四、博客登录页(login.html)
login.html:
<!DOCTYPE html>
<html lang="en">

<head>
    <meta charset="UTF-8">
    <meta http-equiv="X-UA-Compatible" content="IE=edge">
    <meta name="viewport" content="width=device-width, initial-scale=1.0">
    <title>登陆页面</title>
    <link rel="stylesheet" href="css/conmmon.css">
    <link rel="stylesheet" href="css/login.css">
</head>

<body>
    <!-- 导航栏 -->
    <div class="nav">
        <img src="img/logo2.jpg" alt="">
        <span class="title">MeowBlog</span>
        <!-- 用来占据中间位置 -->
        <span class="spacer"></span>
        <a href="blog_list.html">主页</a>
        <a href="reg.html">注册</a>
    </div>
    <!-- 版心 -->
    <div class="login-container">
        <!-- 中间的登陆框 -->
        <div class="login-dialog">
            <h3>登陆</h3>
            <div class="row">
                <span>用户名</span>
                <input type="text" id="username">
            </div>
            <div class="row">
                <span>密码</span>
                <input type="password" id="password">
            </div>
            <div class="row">
                <button id="submit">提交</button>
            </div>
        </div>
    </div>
</body>

</html>
“login.css”编写:
.login-container { width: 100%; height: calc(100% - 50px); display: flex; justify-content: center; align-items: center; } .login-dialog { width: 400px; height: 400px; background-color: rgba(255, 255, 255, 0.8); border-radius: 10px; } .login-dialog h3 { padding: 50px 0; text-align: center; } .login-dialog .row { height: 50px; display: flex; justify-content: center; align-items: center; } .login-dialog .row span { display: block; width: 100px; font-weight: 700; } .login-dialog .row input { width: 200px; height: 40px; line-height: 40px; font-size: 24px; border-radius: 10px; border: none; outline: none; text-indent: 10px; } .login-dialog button { width: 300px; height: 50px; color: white; background-color: black; border: none; border-radius: 10px; } .login-dialog button:active { background-color: #666; }五、博客注册页(reg.html)
reg.html:
<!DOCTYPE html>
<html lang="en">

<head>
    <meta charset="UTF-8">
    <meta http-equiv="X-UA-Compatible" content="IE=edge">
    <meta name="viewport" content="width=device-width, initial-scale=1.0">
    <title>注册页面</title>
    <link rel="stylesheet" href="css/conmmon.css">
    <link rel="stylesheet" href="css/login.css">
</head>

<body>
    <!-- 导航栏 -->
    <div class="nav">
        <img src="img/logo2.jpg" alt="">
        <span class="title">MeowBlog</span>
        <!-- 用来占据中间位置 -->
        <span class="spacer"></span>
        <a href="blog_list.html">主页</a>
        <a href="login.html">登陆</a>
        <!-- <a href="#">注销</a> -->
    </div>
    <!-- 版心 -->
    <div class="login-container">
        <!-- 中间的注册框 -->
        <div class="login-dialog">
            <h3>注册</h3>
            <div class="row">
                <span>用户名</span>
                <input type="text" id="username">
            </div>
            <div class="row">
                <span>密码</span>
                <input type="password" id="password">
            </div>
            <div class="row">
                <span>确认密码</span>
                <input type="password" id="password">
            </div>
            <div class="row">
                <button id="submit">提交</button>
            </div>
        </div>
    </div>
</body>

</html>
六、博客个人中心(myblog_list.html)
<!DOCTYPE html>
<html lang="en">
<head>
<meta charset="UTF-8">
<meta http-equiv="X-UA-Compatible" content="IE=edge">
<meta name="viewport" content="width=device-width, initial-scale=1.0">
<title>博客列表</title>
<link rel="stylesheet" href="css/conmmon.css">
<link rel="stylesheet" href="css/blog_list.css">
</head>
<body>
<!-- 导航栏 -->
<div class="nav">
<img src="img/logo2.jpg" alt="">
<span class="title">MeowBlog</span>
<!-- 用来占据中间位置 -->
<span class="spacer"></span>
<a href="blog_list.html">主页</a>
<a href="blog_edit.html">写博客</a>
<a href="#">注销</a>
</div>
<!-- 版心 -->
<div class="container">
<!-- 左侧个人信息 -->
<div class="container-left">
<div class="card">
<img src="img/avatar.png" class="avtar" alt="">
<h3>小可爱</h3>
<a href="http:www.github.com">github 地址</a>
<div class="counter">
<span>文章</span>
<span>分类</span>
</div>
<div class="counter">
<span>2</span>
<span>1</span>
</div>
</div>
</div>
<!-- 右侧内容详情 -->
<div class="container-right">
<!-- 每一篇博客包含标题, 摘要, 时间 -->
<div class="blog">
<div class="title">我的第一篇博客</div>
<div class="date">2021-06-02</div>
<div class="desc">
从今天起, 我要认真敲代码. Lorem ipsum, dolor sit amet consectetur adipisicing elit. Cum distinctio ullam eum ut
veroab laborum numquam tenetur est in dolorum a sint, assumenda adipisci similique quaerat vel.
Facere,
et.
</div>
<a href="blog_content.html?id=1" class="detail">查看全文 >></a>
<a href="blog_content.html?id=1" class="detail">修改 >></a>
<a href="blog_content.html?id=1" class="detail">删除 >></a>
</div>
</div>
</div>
</body>
</html>七、博客编辑页面(bolog_edit.html)
1.editor.md文件下载
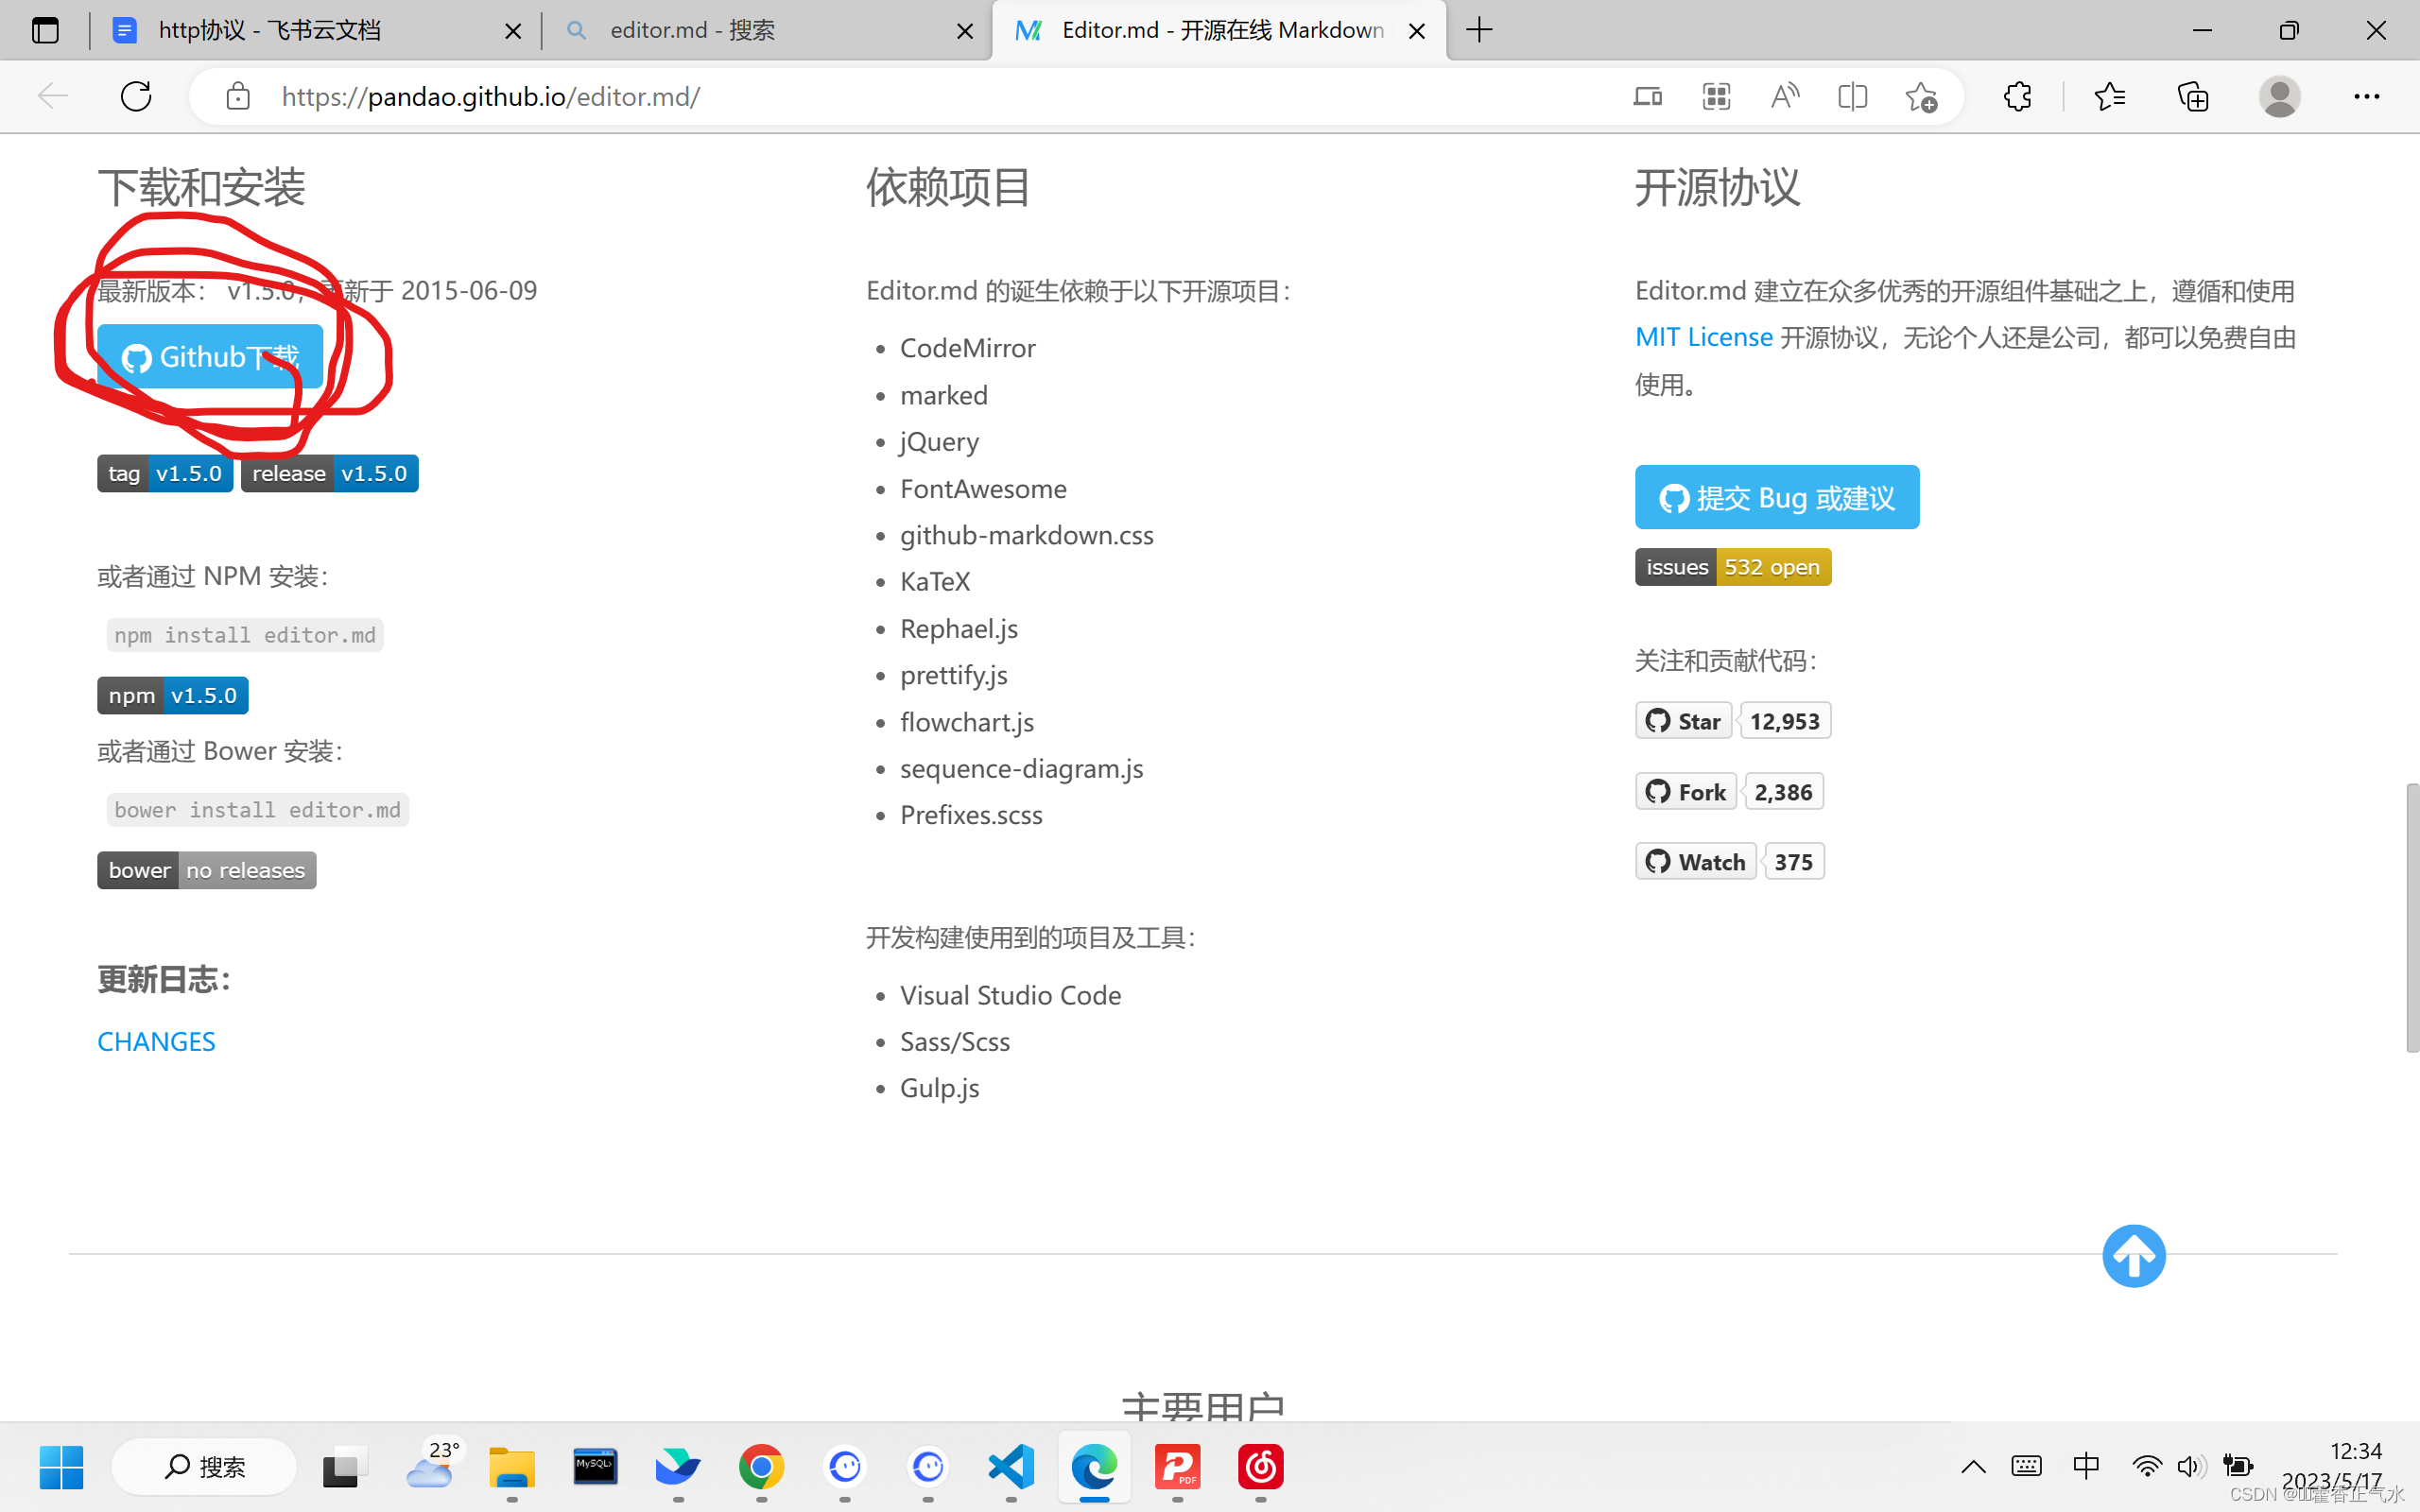
这个editor.md文件就是MarkDown编辑器开源文件,这个编辑器我们不需要自己编写,可以直接用别人写好了的源码,我们只需要写一个标题框和提交按钮就可以了。
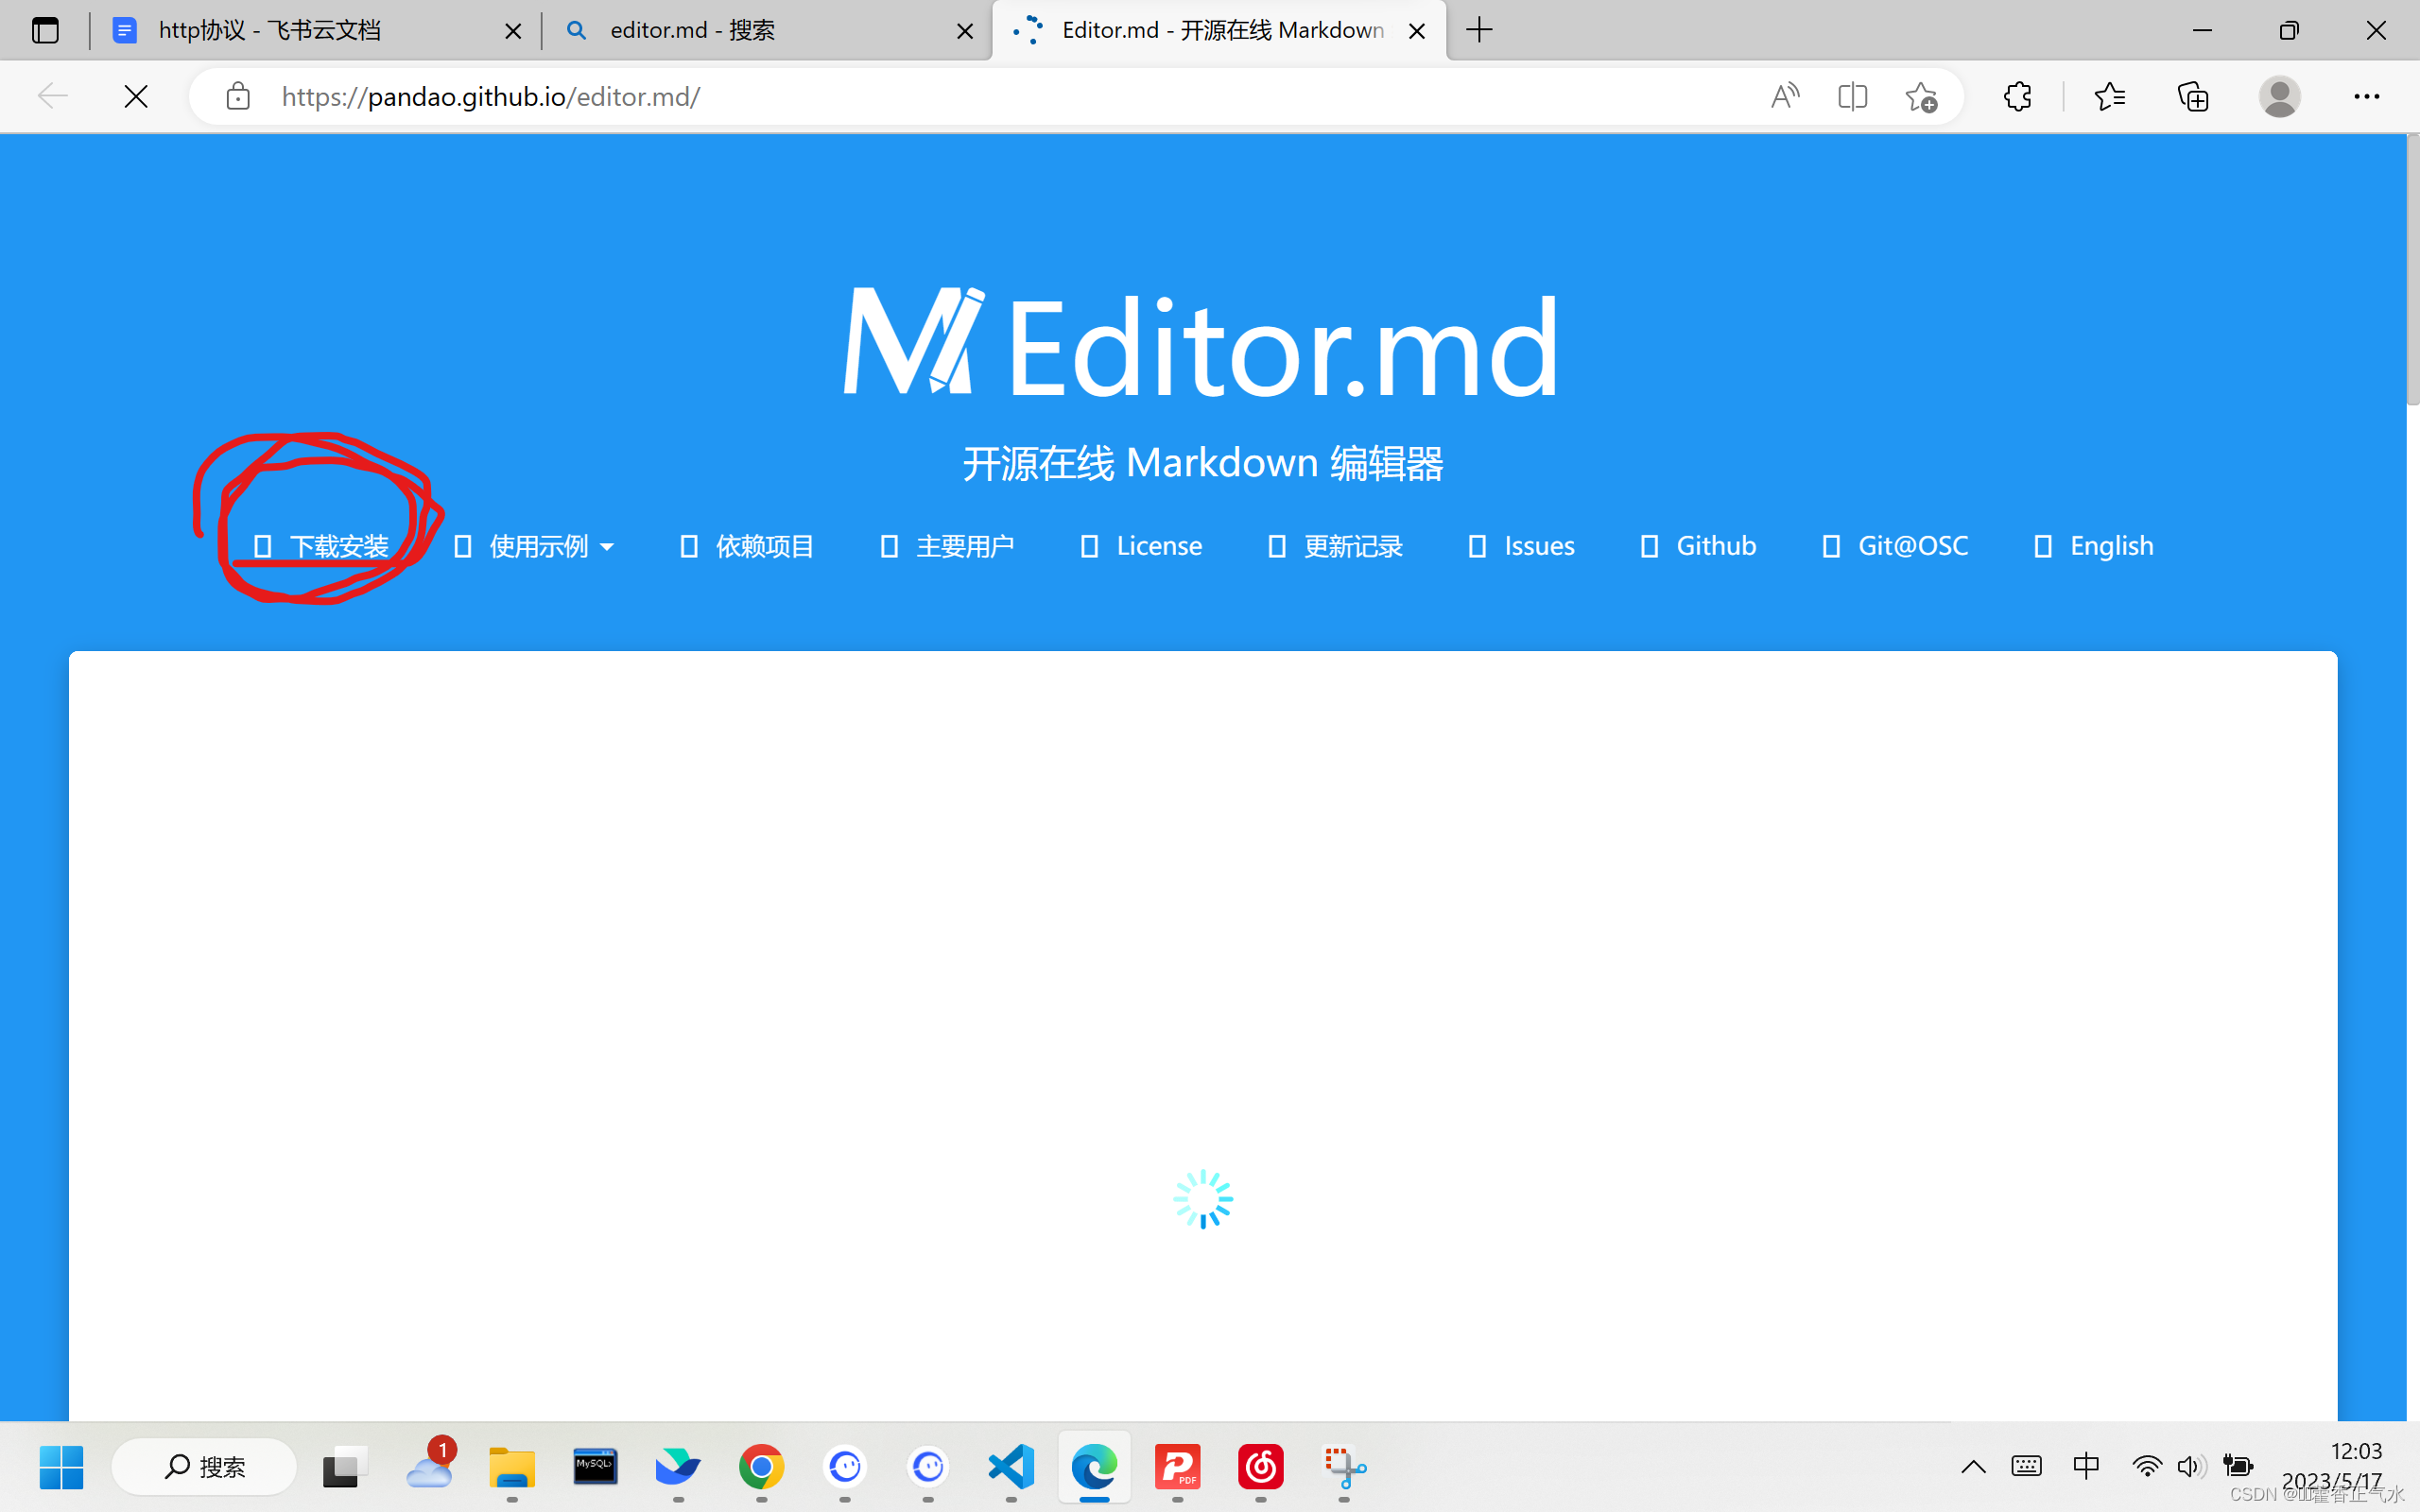
大家先进入这个网站:
https://pandao.github.io/editor.md/
下面这个图片我这里网卡了,然后框里的东西没加载出来,不过不影响,
大家直接点解下载安装
然后回跳转下来: github下载,如果github下载不了,大家就下载一个steam加速器,然后里面有github加速的选项,就可以下载了。
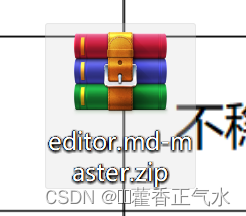
下载路径为了避免找不到,大家可以直接将安装包下到桌面吧。
出现下面这样一个安装包以后:
将这个压缩包解压缩,解压缩以后将这个文件放到我们的博客系统blog_system中,命名为editor.md。
2.博客编辑页”blog_editor”
blog_edit.html
<!DOCTYPE html>
<html lang="en">

<head>
    <meta charset="UTF-8">
    <meta http-equiv="X-UA-Compatible" content="IE=edge">
    <meta name="viewport" content="width=device-width, initial-scale=1.0">
    <title>博客编辑</title>

    <!-- 引入自己写的样式 -->
    <link rel="stylesheet" href="css/conmmon.css">
    <link rel="stylesheet" href="css/blog_edit.css">

    <!-- 引入 editor.md 的依赖 -->
    <link rel="stylesheet" href="editor.md/css/editormd.min.css" />
    <script src="js/jquery.min.js"></script>
    <script src="editor.md/editormd.js"></script>
</head>

<body>
    <!-- 导航栏 -->
    <div class="nav">
        <img src="img/logo2.jpg" alt="">
        <span class="title">MeowBlog</span>
        <!-- 用来占据中间位置 -->
        <span class="spacer"></span>
        <a href="blog_list.html">主页</a>
        <a href="#">注销</a>
    </div>
    <!-- 编辑框容器 -->
    <div class="blog-edit-container">
        <!-- 标题编辑区 -->
        <div class="title">
            <input type="text" placeholder="在这里写下文章标题">
            <button onclick="mysub()">发布文章</button>
        </div>
        <!-- 创建编辑器标签 -->
        <div id="editorDiv">
            <textarea id="editor-markdown" style="display:none;"></textarea>
        </div>
    </div>

    <script>
        var editor;
        function initEdit(md){
            // 编辑器设置
            editor = editormd("editorDiv", {
                // 这里的尺寸必须在这里设置. 设置样式会被 editormd 自动覆盖掉.
                width: "100%",
                // 高度 100% 意思是和父素一样高. 要在父素的基础上去掉标题编辑区的高度
                height: "calc(100% - 50px)",
                // 编辑器中的初始内容
                markdown: md,
                // 指定 editor.md 依赖的插件路径
                path: "editor.md/lib/",
                saveHTMLToTextarea: true //
            });
        }
        initEdit("# 在这里写下一篇博客"); // 初始化编译器的值
        // 提交
        function mysub(){
            // alert(editor.getValue()); // 获取值
            // editor.setValue("#123") // 设置值
        }
    </script>
</body>

</html>
blog_edit.css:
.blog-edit-container { width: 1000px; height: calc(100% - 50px); margin: 0 auto; } .blog-edit-container .title { width: 100%; height: 50px; display: flex; justify-content: space-between; align-items: center; } .blog-edit-container .title input { height: 40px; width: 890px; text-indent: 10px; border-radius: 10px; outline: none; border: none; background-color:rgba(255, 255, 255, 0.8); } .blog-edit-container .title button { height: 40px; width: 100px; color: white; background-color: orange; border: none; outline: none; border-radius: 10px; } #editor { border-radius: 10px; /* 针对 #editor 用 bgc 属性无法设置半透明了. 里面包含的内容带了背景色 */ /* background-color:rgba(255, 255, 255, 0.8); */ /* 可以使用 opacity 属性实现 */ opacity: 80%; }2024最新激活全家桶教程,稳定运行到2099年,请移步至置顶文章:https://sigusoft.com/99576.html
版权声明:本文内容由互联网用户自发贡献,该文观点仅代表作者本人。本站仅提供信息存储空间服务,不拥有所有权,不承担相关法律责任。如发现本站有涉嫌侵权/违法违规的内容, 请联系我们举报,一经查实,本站将立刻删除。 文章由激活谷谷主-小谷整理,转载请注明出处:https://sigusoft.com/161600.html


